Git Part II — Advanced Gittiness
Here further on the path of Git, we get more into the powerful commands and operations that can save your butt, or really get you into trouble.
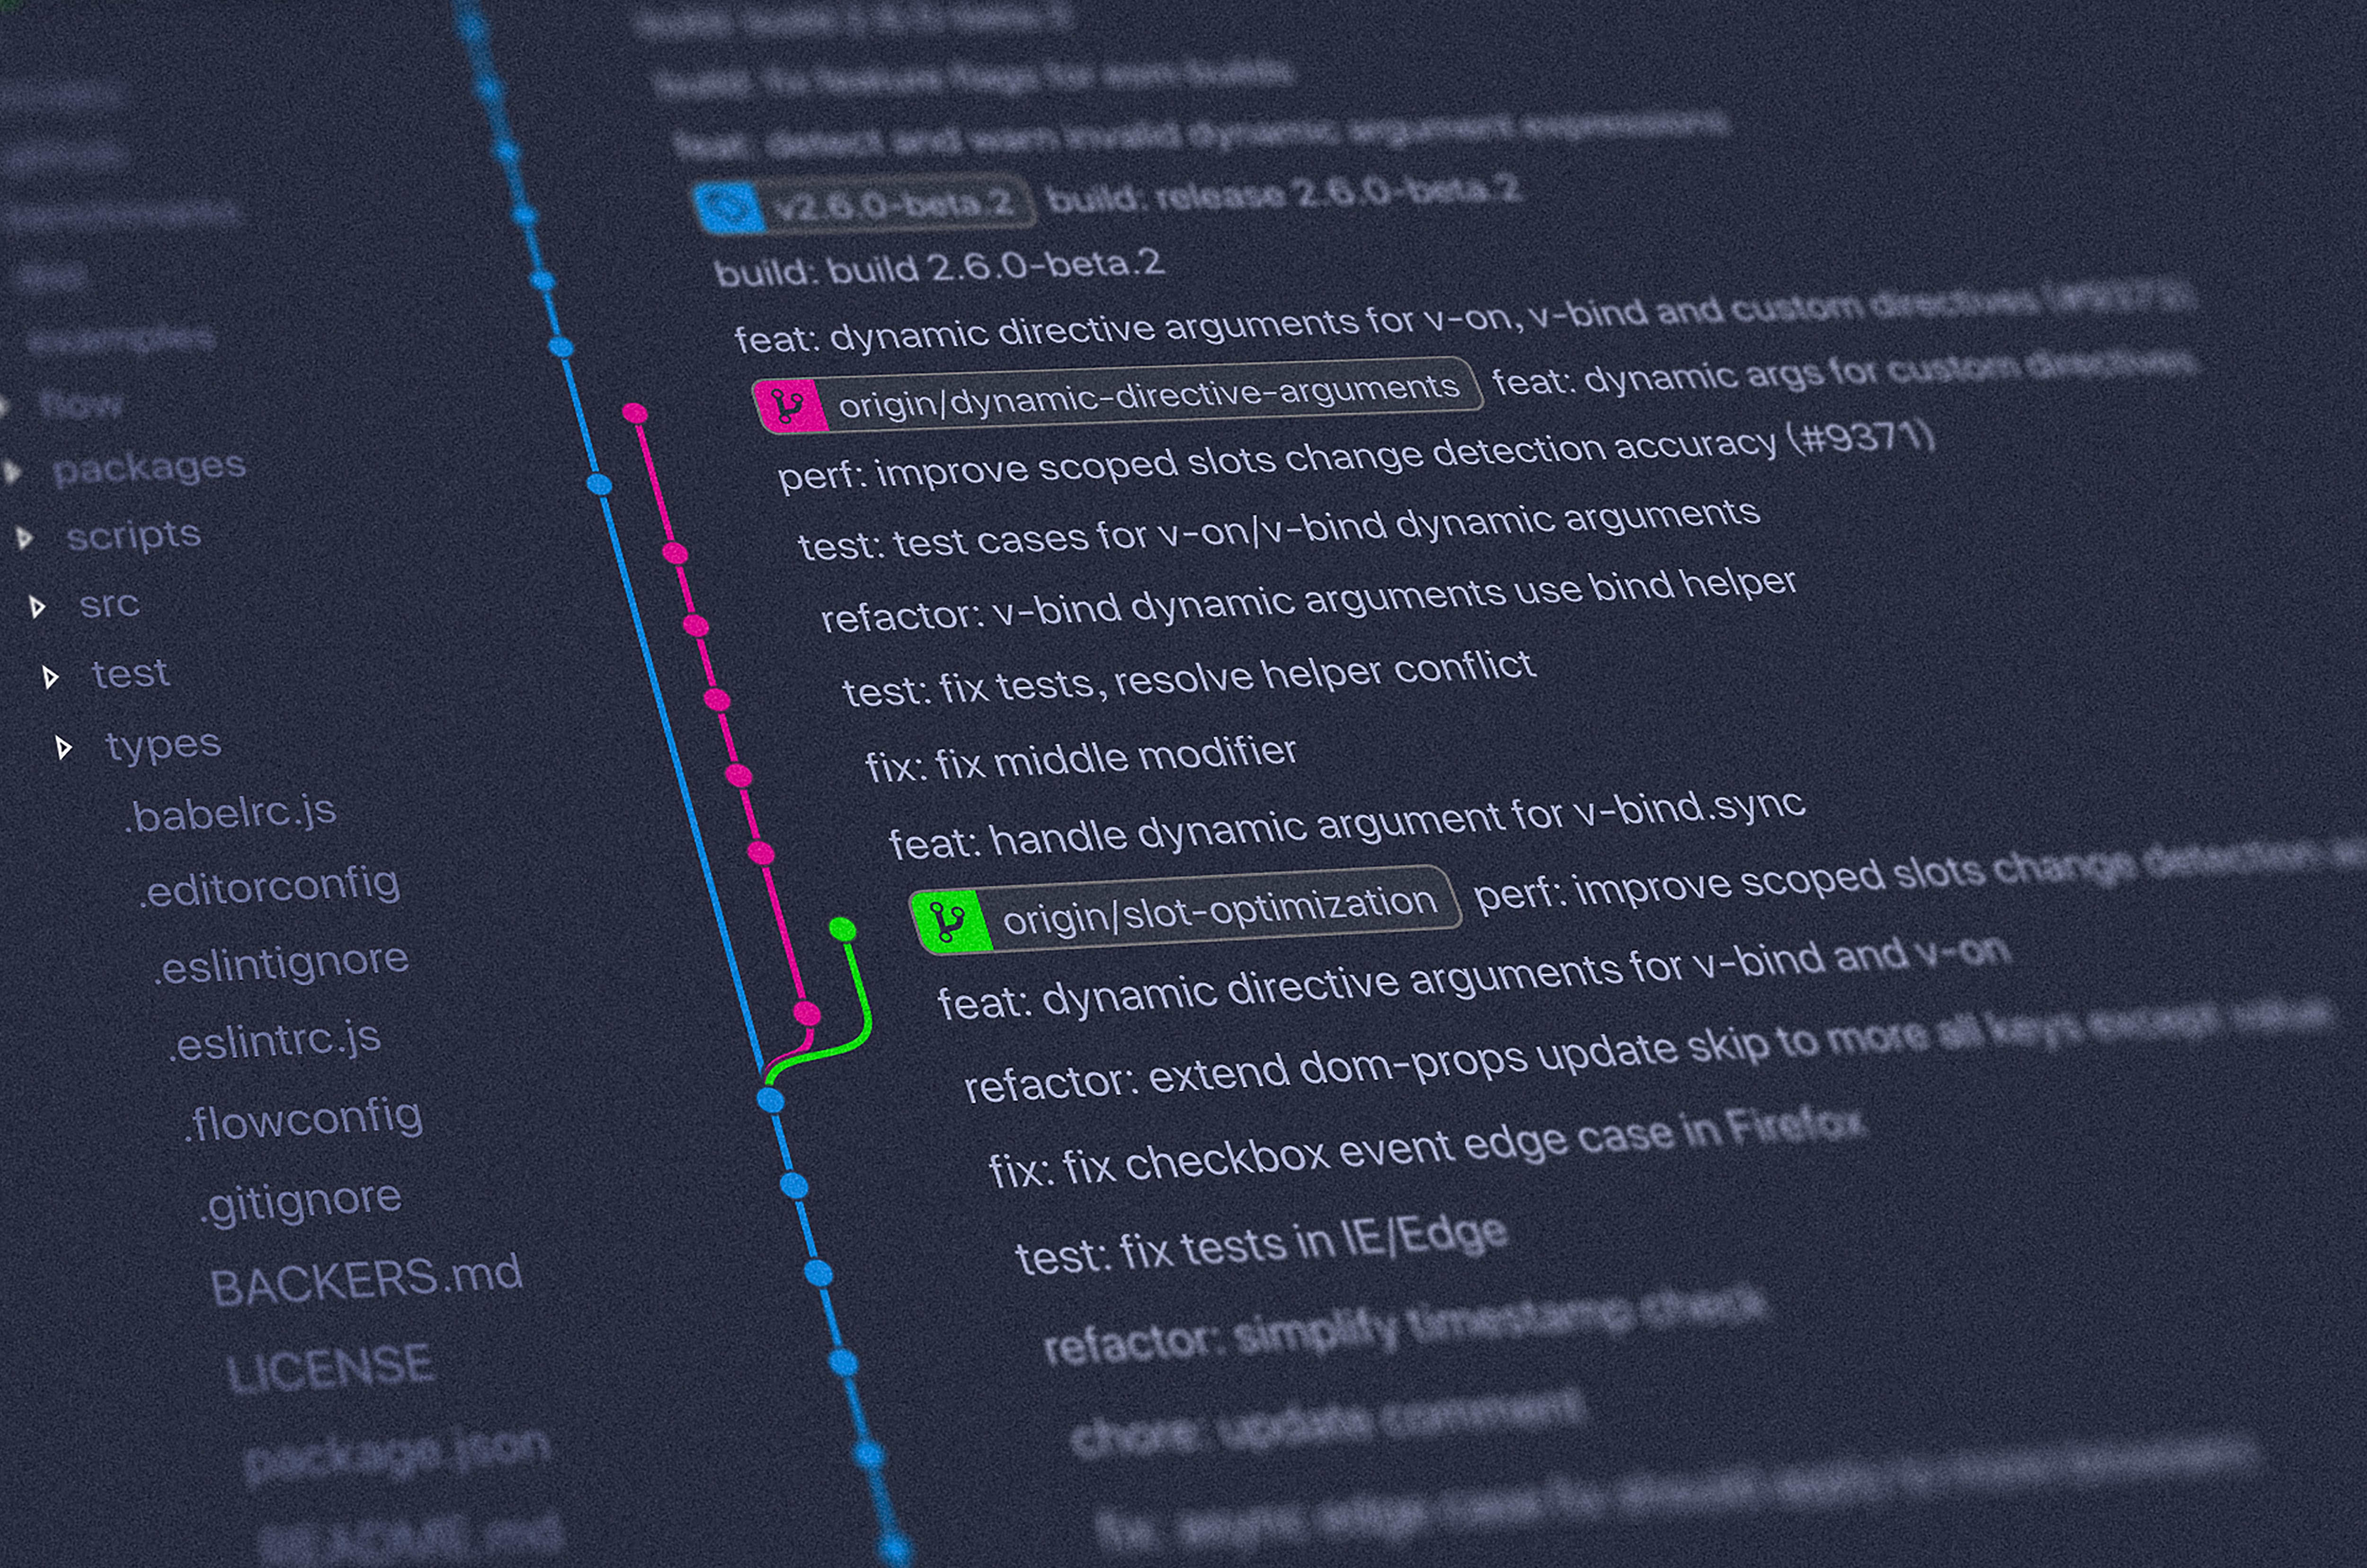
Time to get… branchy. Photo by Yancy Min on Unsplash.
Didn’t have enough with the last batch git-ducation? Well, here’s another round. This time, we’re taking it up a notch.
git rebase
A good portion of Git is tracking your history. Generally, the idea is to have a primary branch (most often called the main or master branch) and then have sub-branches where contributors can add new or alternate features. But given enough chefs in the kitchen, even carefully coordinated pros, and that can quickly start to look a lot like a mess.
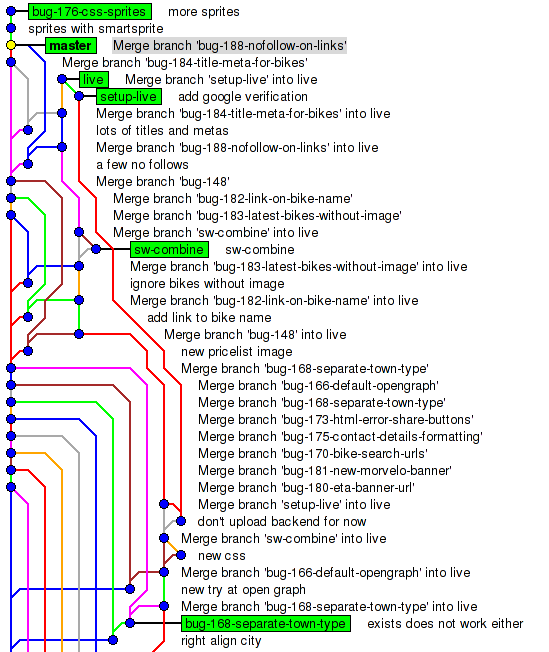
This is actually not the worst you can find. For fun and entertainment, try doing an image search of “git spaghetti”. Photo via Attlassian.
Enter git rebase. Rebasing your Git is often referred to as “revising history” and an alternative to merging. It’s essentially shifting the base of your branch commits by moving them as duplicated commits on top of your main/master (or whatever branch you choose) to form a linear line of commits.
This offers some distinct advantages. First, it’s more readable. That’s not a little thing for a big project with a lot of developers, who (when done correctly) can trace features and parts for a project without that meme of complex mathematics appearing in front of their faces.
Second, this allows you to build forks and branches together again in a more logical, linear progression when they might not have been that way initially. If a team suddenly realizes they should have had a feature late in a project, that logically should have come early, they can git rebase for a neater order.
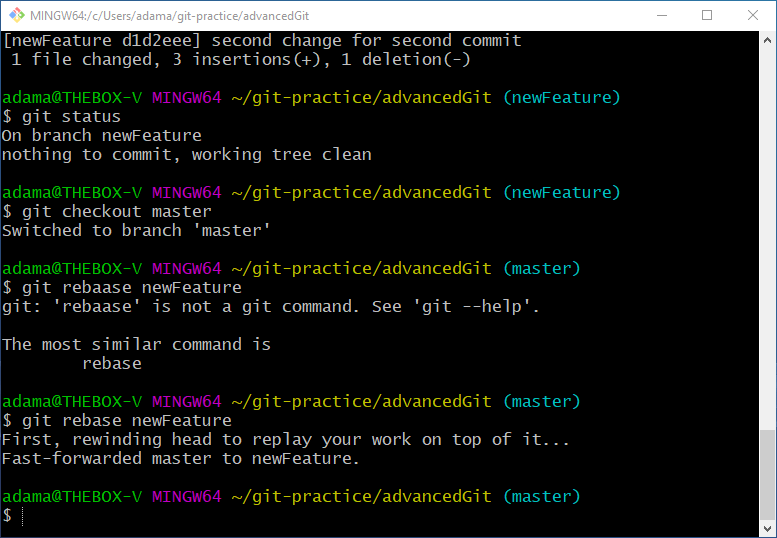
git rebase [rebaseFromFile] is a good way to clarify the order of a commit before the final push. It also works better when you spell it correctly.
But there are a couple of hazards when rebasing. First and foremost, rebasing should not be done in a public repo. Some go as far as to call this The Golden Rule of Rebasing. As noted by the article, this would move all commits to the tip of main/master only for your repository. Fixing this will require a messy merge, so avoiding it is best.
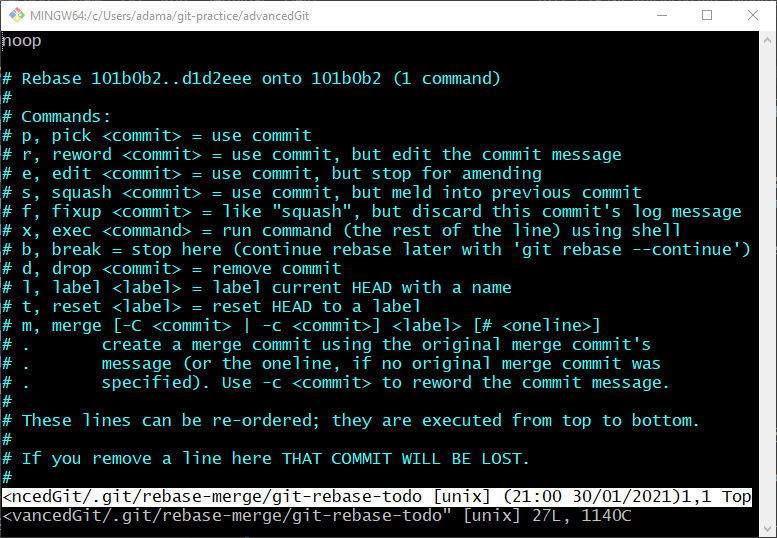
By adding the -interactive option, you open up a much more tailored rebasing experience. This is more often used to clean up a messy history before committing to the master/main branch.
Also, since rebasing equates to revision of history for clarity’s sake, some of that clarity comes at a cost of context in which the actual branching was done.
In all, rebasing is a good way to get your commit in neat and logical order locally, and as a workflow of changes before pushing it online, it has plenty of advocates.
But once the repo goes public, you better tread very carefully.
git checkout
In a sense, git checkout acts like getting a book from the library: you “checkout” an individual branch. By doing so, you move your working area to that branch, and changes you make will be tracked there. In the same vein, merges you make will be to the branch you’ve checked out, so to merge or rebase to your main/master, you have to make sure you checkout before you merge.
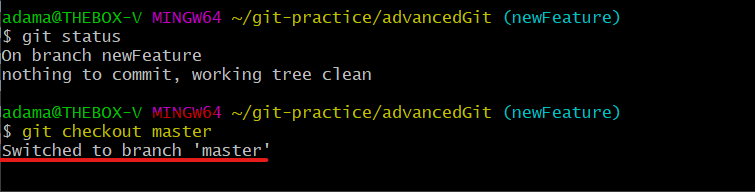
Switching between branches, or created a new one with the -b option, is made easy by git checkout.
You can checkout the most recent commit of a branch, or a previous commit based on the commit’s absolutely unique ID number, leading to what’s referred to as a detached HEAD. From there, you can create new branches of the previous commits… but you shouldn’t. Instead, you should checkout to the latest branch again. If you want to walk back your commits, you should use git revert (more on that in a bit).
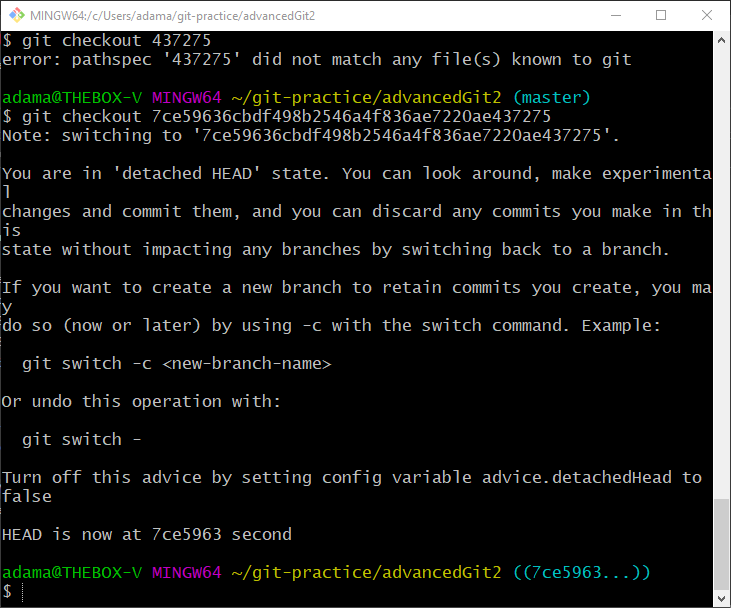
Checking out to previous branch is useful to testing and peering through history, but beware zombie commits when you have a “detached HEAD”.
You can also directly create a new branch by adding the -b option before the branch name to create and immediately check out a new branch. Nifty.
git reset and git revert
There has not been a coder that has ever coded that has never screwed something up in a commit. So here are a couple ways to fix what you broke, using two Git versions of Ctrl+Z.
Of the two, git reset can be more of the nuclear option. There are three different options for git reset: --soft (which simply moves your committed changes back into the staging area), --mixed (which is the default when git reset is called, and moves changes back into the working directory), and --hard, the truly keys-turning-in-unison, hit-the-big-red-button option that sends everything you changed right into the trash.
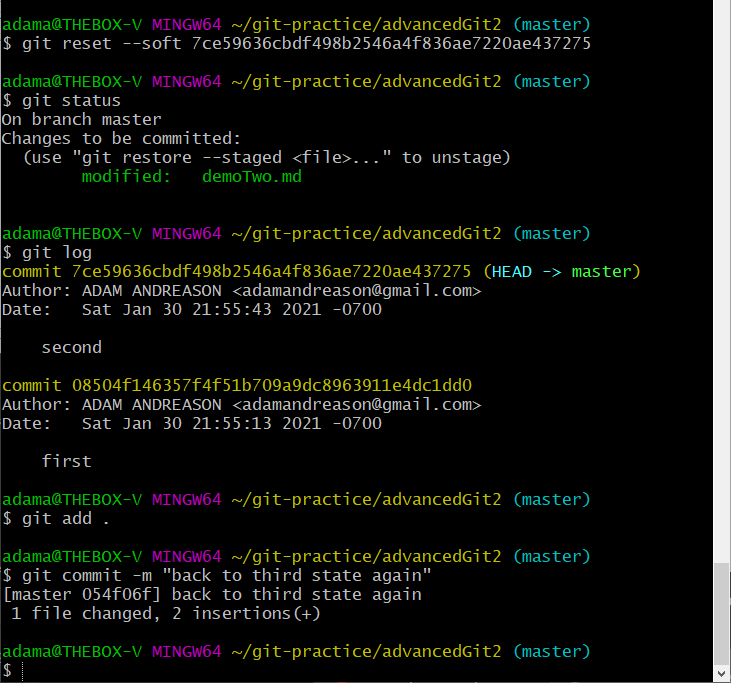
By git reset --soft here, I sent my third commit on the local repo back to the staging area. By re-adding and committing, it get’s sent back again, with now a my newest message in the log and a new commit. The old commit is effectively erased.
The --hard option also cleans out anything in your staging area and working directory, and if done to a remote repo, orphans any commits you have reset from. Especially if commits have already gone remote, you could potentially entangle your coding colleagues with confusion, so this should not be your first option.
git revert, on the other hand, is the more commonly used, less cut-thee-in-twain, permanent solution to rolling back bad commits.
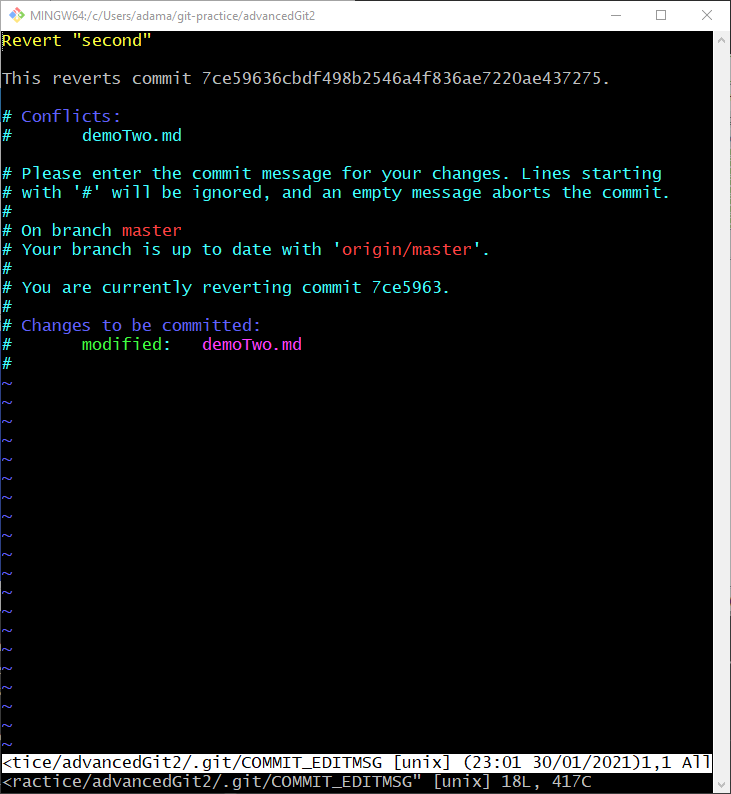
Here is the final step before a revert will process. If you have conflicts, like I have here, best resolve them and then commit with a message, or :q to call it good and complete the revert. If this is a remote repo, you still need to push the changes.
Instead of excising some portion or all of your commit history for a project on your repo, revert simply creates a new commit at an earlier point in your commit history of your choosing. It does not revise the history, but branches from an earlier point. Like Avengers Endgame (and if you don’t remember that, you probably didn’t really watch the movie, because boy did they beat us over the head with it.)
In general, getting your ducks in a row locally can call for rebase, reset, and others, but once out in the wild, revert is the safe option.
Another cool tip? You can use the --abort option on rebase, revert etc. to cancel the operation halfway. Handy.
Submodule
Submodules are repositories within repositories. Basically, it’s Git-ception.

Mainly, Git submodules are useful for providing separation to a feature or aspect that is subordinate to but somewhat independent from the main module.
These can then be plugged into the main module as desired, or even exported to other projects and repos. This is great for breaking up teams for working on sub-projects in parallel to the main project.
Adding a submodule to your own repo makes a full clone of whatever was in that submodule, and references the repo of its origin at the commit where it was incorporated into your code. To update your submodule, you would simply checkout that later version.
Submodules can, however, add an extra layer of complexity to your Git work that opens the door for errors. It can have some issues with scaling, too.
You can create submodules manually in your terminal by first initializing Git in separate directory from your main project, and then using git submodule add ./<submoduleDirectoryName> to add the repo to the index of your main repo. GitHub and GitKraken also have tools that let you add and track submodules.
For more information on submodules, here’s a nice overview:
Got all that? Yes? No? No problem: it never hurts to look things up again.
And again.